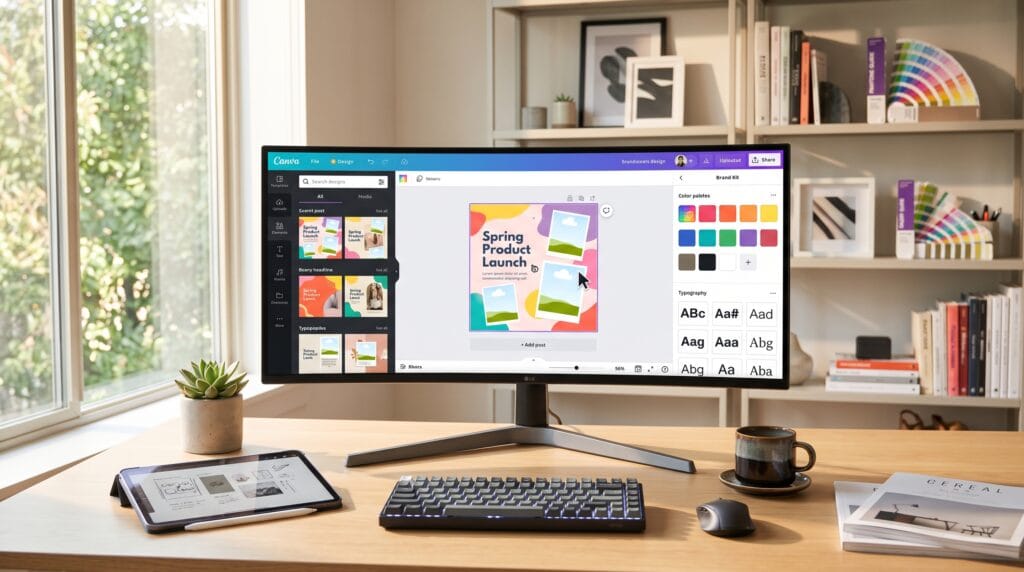
Canva has transformed graphic design by making professional-quality visuals accessible to everyone. Whether you’re a business owner, content creator, marketer, teacher, student, or freelancer, Canva allows you to create stunning designs without advanced graphic design experience. This Canva tutorial will guide you through the essential tools, design principles, and professional workflows needed to create eye-catching graphics for social media, presentations, marketing materials, websites, and more.
Although Canva is beginner-friendly, creating polished, professional designs requires more than dragging and dropping elements onto a canvas. Understanding layout, typography, color theory, branding, and visual hierarchy will help you produce designs that stand out and communicate your message effectively.
Why Learn Canva Tutorials?
Canva has become one of the world’s most popular online design platforms because it combines simplicity with powerful creative tools.
Benefits include:
- Easy drag-and-drop editing
- Thousands of professional templates
- Brand management tools
- Collaboration features
- Cloud-based access
- AI-powered design tools
- Quick export options
Whether you need a social media post or a complete marketing campaign, Canva simplifies the design process.
Getting Started with Canva
Before creating your first design, become familiar with the Canva workspace.
The main interface includes:
- Home Dashboard
- Template Library
- Design Canvas
- Elements Panel
- Uploads
- Text Library
- Brand Kit
- Layers
- Pages
- Download Options
Understanding these sections makes designing much faster.
Canva Tutorials for Choosing the Right Template
Templates provide an excellent starting point.
Popular template categories include:
- Instagram Posts
- Facebook Covers
- LinkedIn Banners
- YouTube Thumbnails
- Presentations
- Flyers
- Business Cards
- Posters
- Infographics
- Resumes
Choose templates that closely match your project to minimize editing time.
Canva Tutorials for Understanding Canva Design Tools
Elements
The Elements panel contains:
- Shapes
- Icons
- Illustrations
- Stickers
- Charts
- Frames
- Grids
- Decorative graphics
Avoid overcrowding your design with too many decorative elements.
Text Tools
Typography plays a major role in professional design.
Canva allows you to:
- Add headings
- Create subheadings
- Format body text
- Apply font combinations
- Adjust spacing
- Change alignment
Limit yourself to two or three fonts for a clean appearance.
Uploads
Upload your own:
- Logos
- Photos
- Videos
- Brand assets
- Icons
Organizing uploads improves workflow efficiency.
Professional Design Principles in Canva Tutorials
Use Visual Hierarchy
Guide viewers through your design by emphasizing the most important information.
Create hierarchy using:
- Font size
- Bold typography
- Color contrast
- Spacing
- Positioning
Important content should immediately attract attention.
Choose a Consistent Color Palette
Professional designs rely on color consistency.
A simple palette typically includes:
- Primary color
- Secondary color
- Accent color
- Neutral background
Avoid using too many unrelated colors.
Master Typography
Good typography improves readability.
Best practices:
- Use large headings
- Keep body text readable
- Maintain consistent spacing
- Limit font combinations
- Align text properly
Typography often determines whether a design feels professional.
Use White Space Effectively
White space improves clarity by preventing visual clutter.
Benefits include:
- Better readability
- Improved focus
- Cleaner layouts
- Modern appearance
Do not feel obligated to fill every empty area.
Building a Brand Kit
Brand consistency strengthens recognition.
Your Canva Brand Kit should include:
- Logo
- Brand colors
- Brand fonts
- Icons
- Images
- Templates
Using a Brand Kit saves time while maintaining consistency.
Working with Images in Canva Tutorials
High-quality images make designs more engaging.
Tips:
- Use high-resolution photos
- Crop carefully
- Adjust brightness and contrast
- Apply subtle filters
- Maintain consistent style
Avoid stretching low-resolution images.
Using Canva AI Features in Canva Tutorials
Canva includes several AI-powered tools that speed up design.
Popular features include:
Use AI as a creative assistant while maintaining your own design direction.
Canva Tutorials to Designing for Social Media
Different platforms require different dimensions.
Common sizes include:
Using the correct dimensions improves visual quality.
Canva Tutorials for Creating Professional Presentations
Canva is an excellent presentation tool.
Include:
- Consistent layouts
- Minimal text
- High-quality visuals
- Charts
- Icons
- Brand colors
Each slide should communicate one primary idea.
Collaboration Features
Canva supports teamwork through:
- Shared folders
- Team templates
- Comments
- Live collaboration
- Permission controls
These features streamline creative projects.
Exporting Your Designs
Canva supports multiple file formats.
Choose based on your project:
- PNG – High-quality graphics
- JPG – Web images
- PDF Standard – Documents
- PDF Print – Professional printing
- SVG – Scalable graphics (Pro)
- MP4 – Videos
- GIF – Simple animations
Select the appropriate format for the best results.
Beginner Design Projects
Practice with real-world examples such as:
- Instagram post
- Business flyer
- Facebook cover
- Presentation
- Resume
- Event poster
- Business card
- YouTube thumbnail
- Infographic
- Product catalog
Hands-on projects accelerate learning.
Professional Canva Tutorials Workflow
Develop these habits:
- Start with a template
- Customize colors and fonts
- Maintain consistent spacing
- Use alignment guides
- Group related elements
- Organize pages logically
- Save reusable templates
A structured workflow saves time and improves quality.
Common Canva Tutorials Mistakes
Avoid these beginner errors:
- Using too many fonts
- Overcrowding layouts
- Poor image quality
- Ignoring alignment
- Inconsistent branding
- Weak color contrast
- Excessive decorative elements
Simple, clean designs usually perform best.
Recommended Canva Resources
| Resource | Purpose |
|---|---|
| Canva Brand Kit | Brand management |
| Canva Templates | Ready-made layouts |
| Canva Magic Studio | AI-powered design |
| Unsplash | Free photography |
| Pexels | Free stock images |
| Pixabay | Images and illustrations |
| Google Fonts | Typography inspiration |
| Coolors | Color palette generation |
Pros and Cons of Canva
| Pros | Cons |
|---|---|
| Easy to learn | Some advanced features require Pro |
| Huge template library | Less flexibility than professional design software |
| Cloud-based collaboration | Internet connection required for most features |
| Fast content creation | Limited advanced image editing |
| AI-powered tools | Premium assets may require a subscription |
Frequently Asked Questions on Canva
1. Is Canva good for beginners?
Yes. Canva is one of the easiest graphic design platforms to learn, making it ideal for beginners while still offering powerful features for professionals.
2. Can professionals use Canva?
Absolutely. Many marketers, entrepreneurs, educators, and designers use Canva for presentations, social media graphics, marketing materials, and brand assets.
3. Is Canva better than Photoshop?
They serve different purposes. Canva excels at quick, template-based graphic design, while Photoshop offers advanced photo editing and complex graphic manipulation.
4. How can I make Canva designs look professional?
Use consistent branding, limit font choices, apply proper spacing, maintain visual hierarchy, use high-quality images, and avoid cluttered layouts.
Canva Tutorilas Design Checklist
- Choose the correct template
- Use consistent branding
- Select complementary colors
- Limit typography choices
- Maintain proper spacing
- Use high-quality images
- Align elements carefully
- Export in the correct format
- Review before publishing
- Save reusable templates
Best Practices for Professional Canva Designs
To create polished designs consistently:
- Build and use a Brand Kit.
- Keep layouts clean and uncluttered.
- Prioritize readability over decoration.
- Maintain consistent colors and typography.
- Use grids and alignment guides.
- Design with your audience in mind.
- Review every design before publishing.
Following these principles will help your designs look more polished, professional, and memorable.
Conclusion on Canva Tutorilas
This Canva tutorial provides everything beginners need to start designing with confidence. By mastering Canva’s workspace, understanding design fundamentals, building a consistent brand identity, and applying professional layout techniques, you can create eye-catching graphics for business, education, marketing, and social media. While Canva makes designing simple, it’s your creativity, consistency, and attention to detail that will truly make your work stand out. With regular practice and thoughtful design choices, you’ll be able to produce professional-quality visuals that effectively communicate your message and strengthen your brand.
Also Read: “100 Gratitude Quotes for a More Positive Life“